How to use the Data Validation Feature
Data Validation was introduced in Excellentable 4.1.0. Please upgrade to Excellentable 4.1 or above to use this feature.
Data validation can be used to restrict the type of data or the values that users enter into a cell. Below are the different types of data validation available for a cell in Excellentable.
| Data Validation Type | Description |
|---|---|
| Restrict numbers entered in a cell to a specified range. For example, you can only allow a whole number between 1 and 100. | |
| List | Restrict entries to predefined items in a list. Displays values in the drop down list based on the values provided in the "Source " field during configuration. For example, you can limit a user’s department selections to IT, HR. |
| Formula List | Restrict entries to predefined values in a list. Displays values in the drop down list based on the values present in the selected cell range. |
| Date | Restrict cell(s) to a date with a specifics criteria. For example, in an employee leave request, prevent someone from entering next year's dates. |
| Text Length | Limit the number of text characters that can be entered in cell. For example, you can limit the allowed text in a cell to 10 or fewer characters. |
| Custom | Validate data based on formulas or values in other cells |
Example
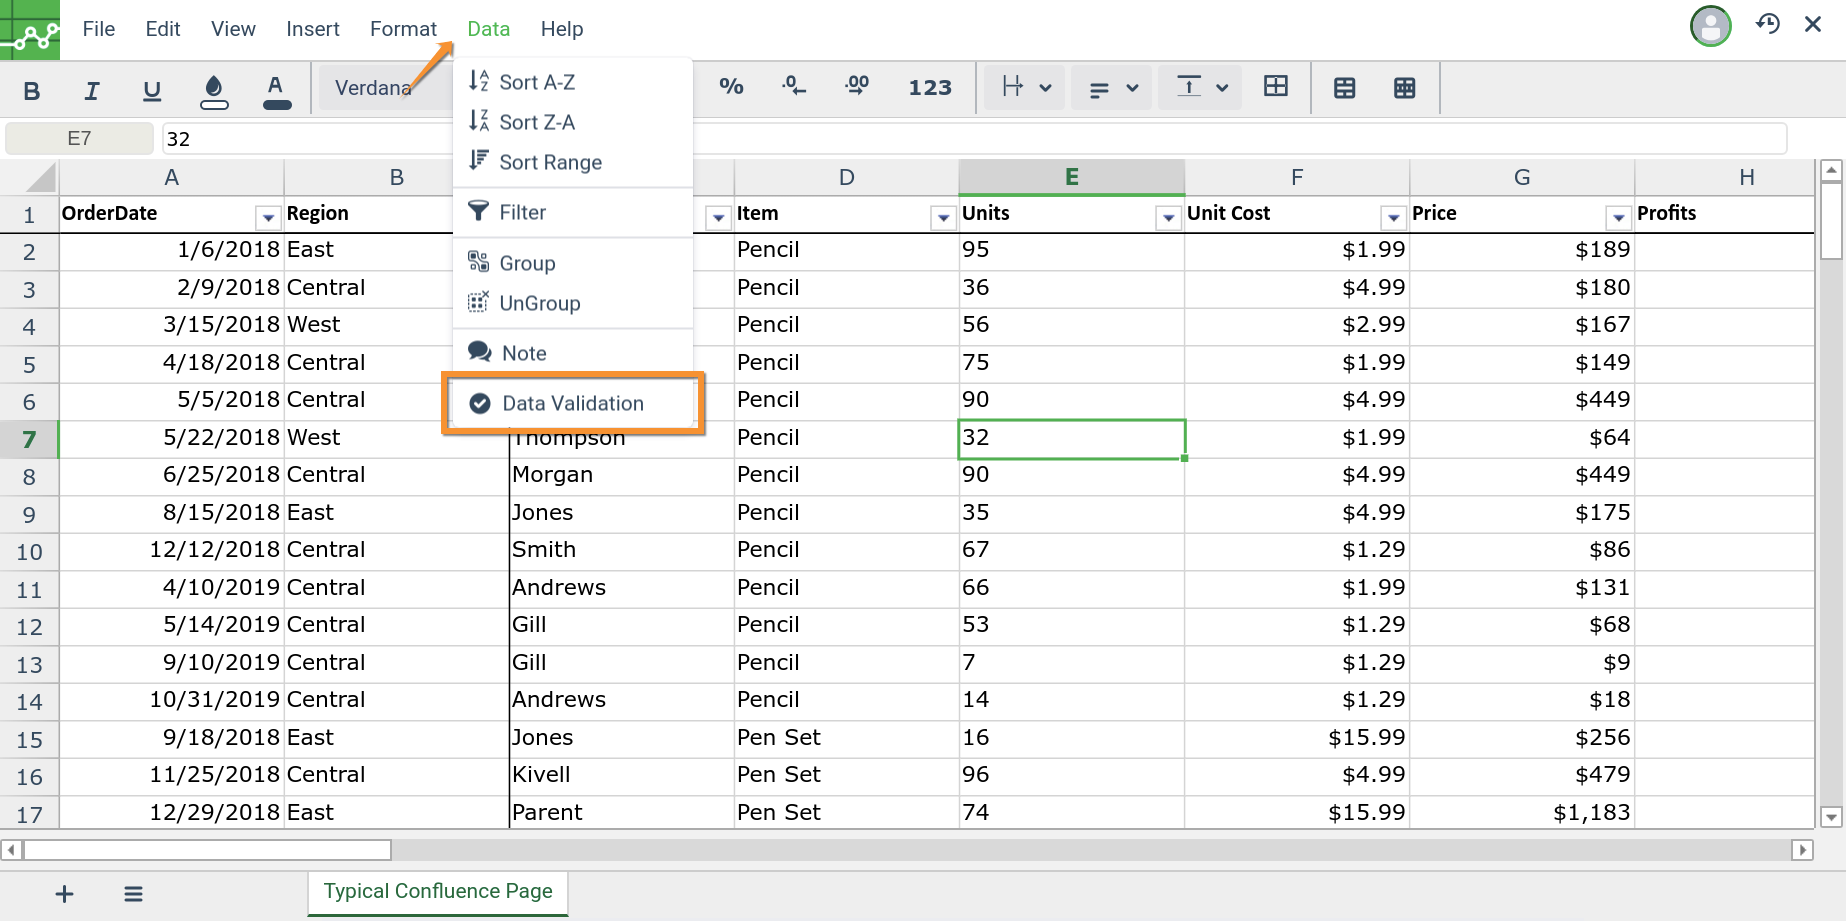
- Select the cell/cells where you want to apply the data validation.
- Select Data → Data Validation. You can also apply data validation to a group of cells, entire rows/columns etc.
- Data Validation dialog appears on the Right. Select the "Number" criteria from the drop-down. You can select any available condition from the drop-down (Between, Equal To, etc). Based on the condition, provide the input values.
In this example, we select the "Between" condition from the dropdown. We want to restrict the cell value between 10 and 20 and provide the values accordingly.
(Optional) if you want the cell value to be an Integer only, check the "Allow Integer" checkbox. If you want to Ignore the blank cells from the data validation, toggle the switch "Ignore Blank Cells" to ON.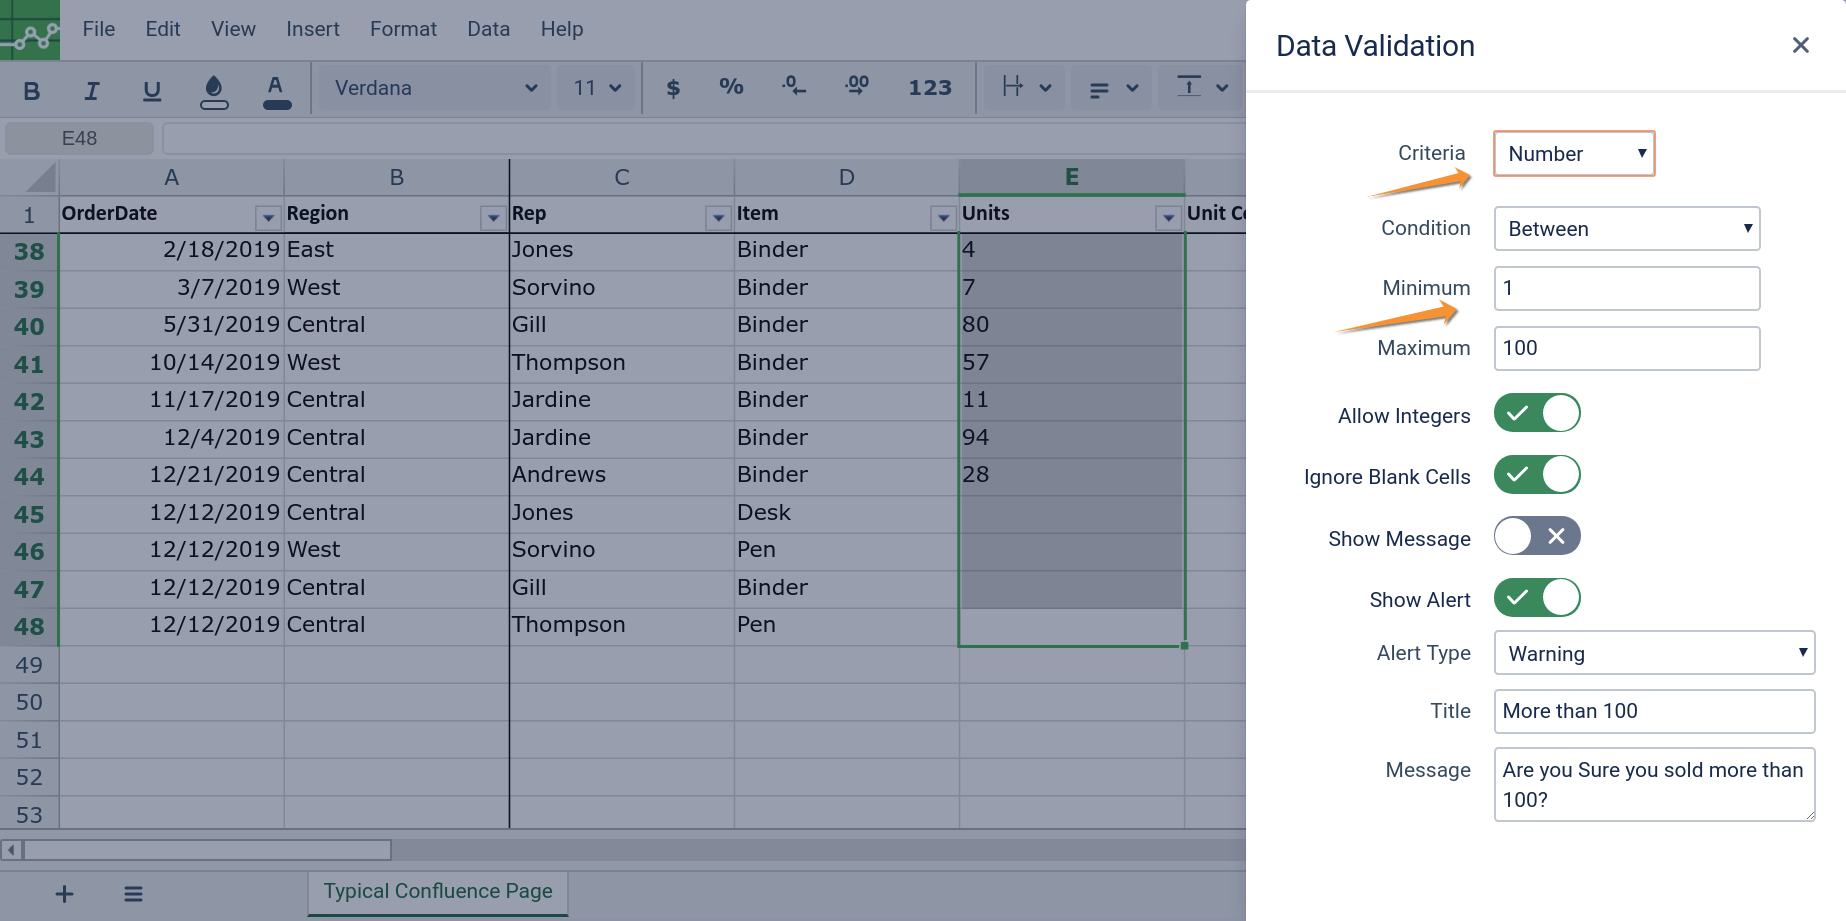
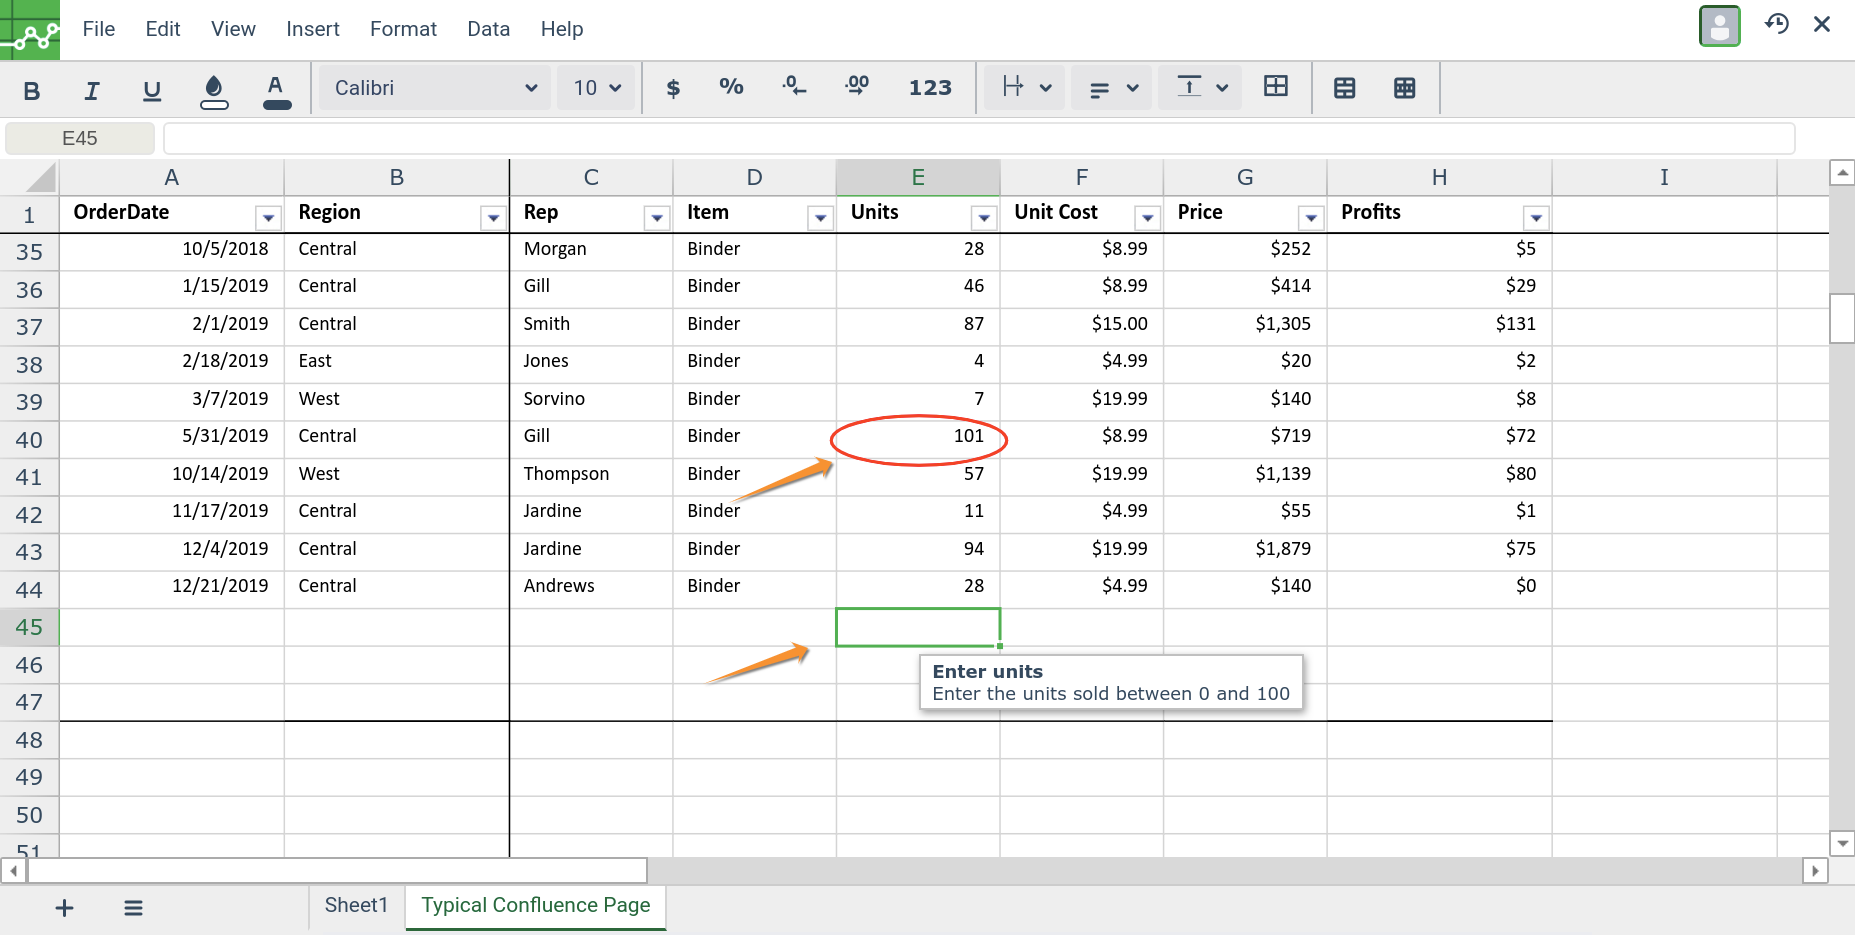
- (Optional) Enter the message for users
A message that will be displayed when the user hovers over the cell
Furthermore, if you want the cell value to be an Integer only, check the "Allow Integer" checkbox. If you want to Ignore the blank cells from the data validation, toggle the switch "Ignore Blank Cells" to ON.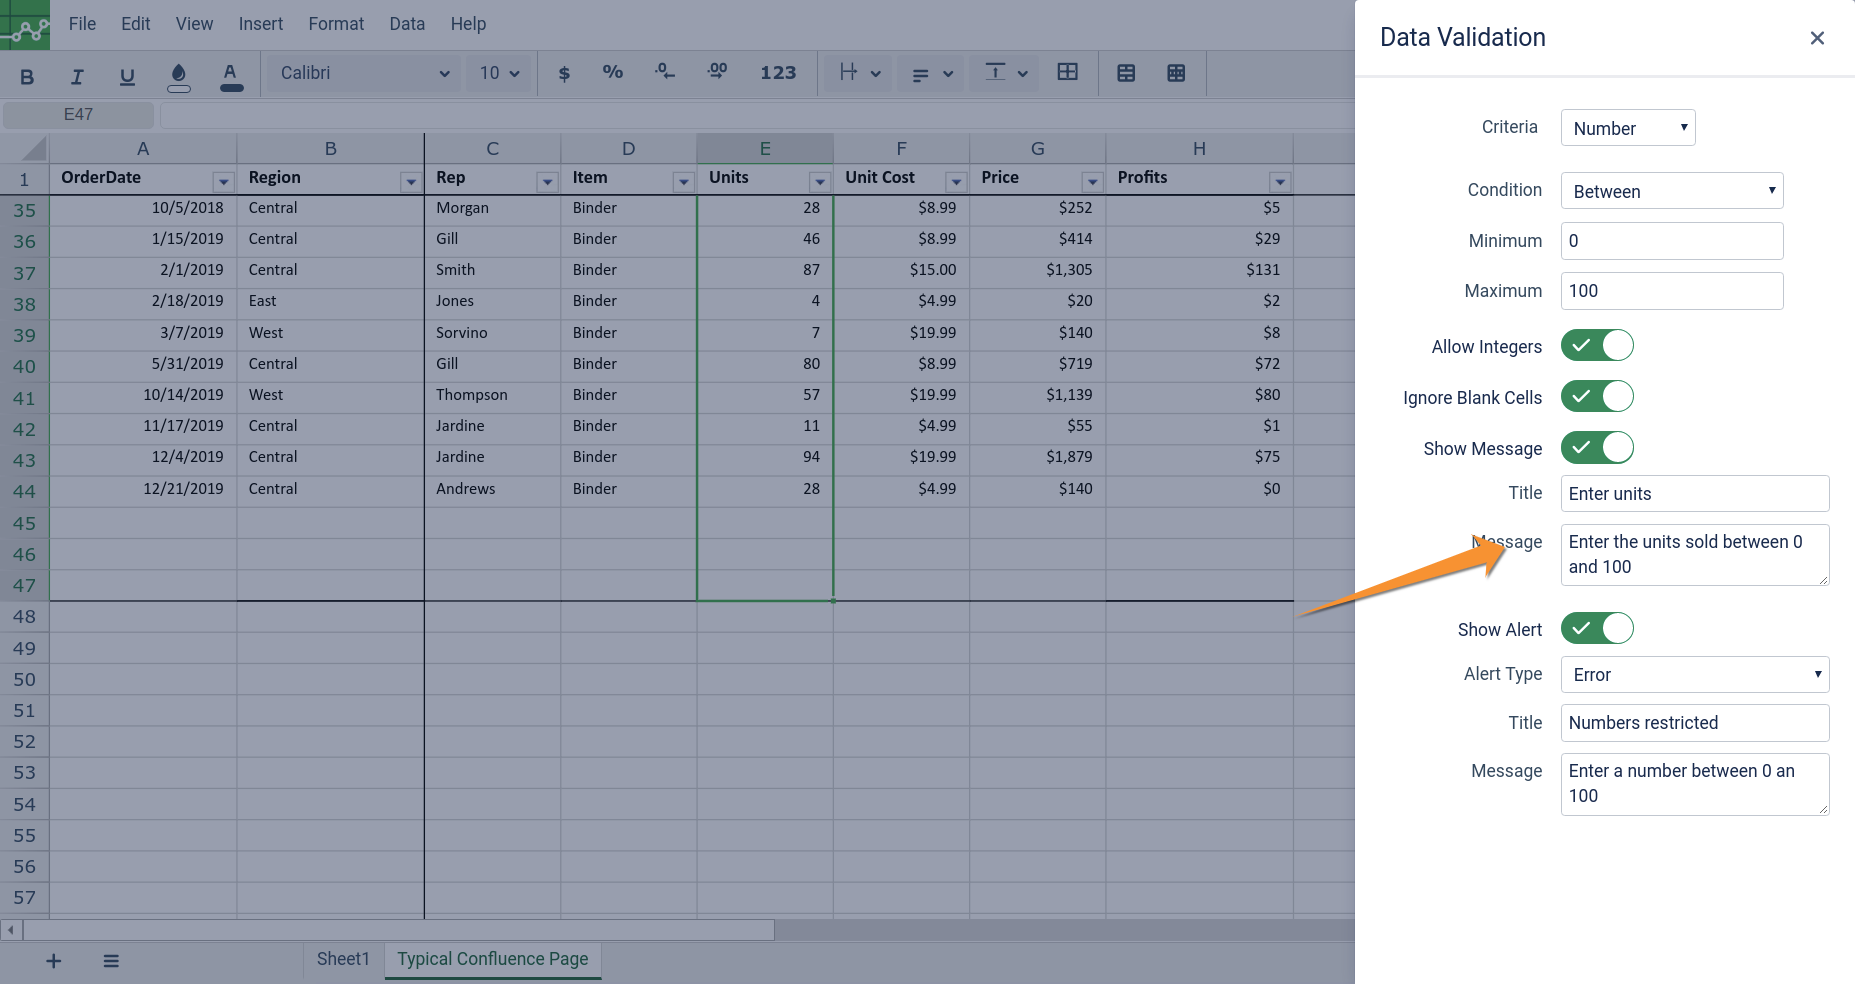
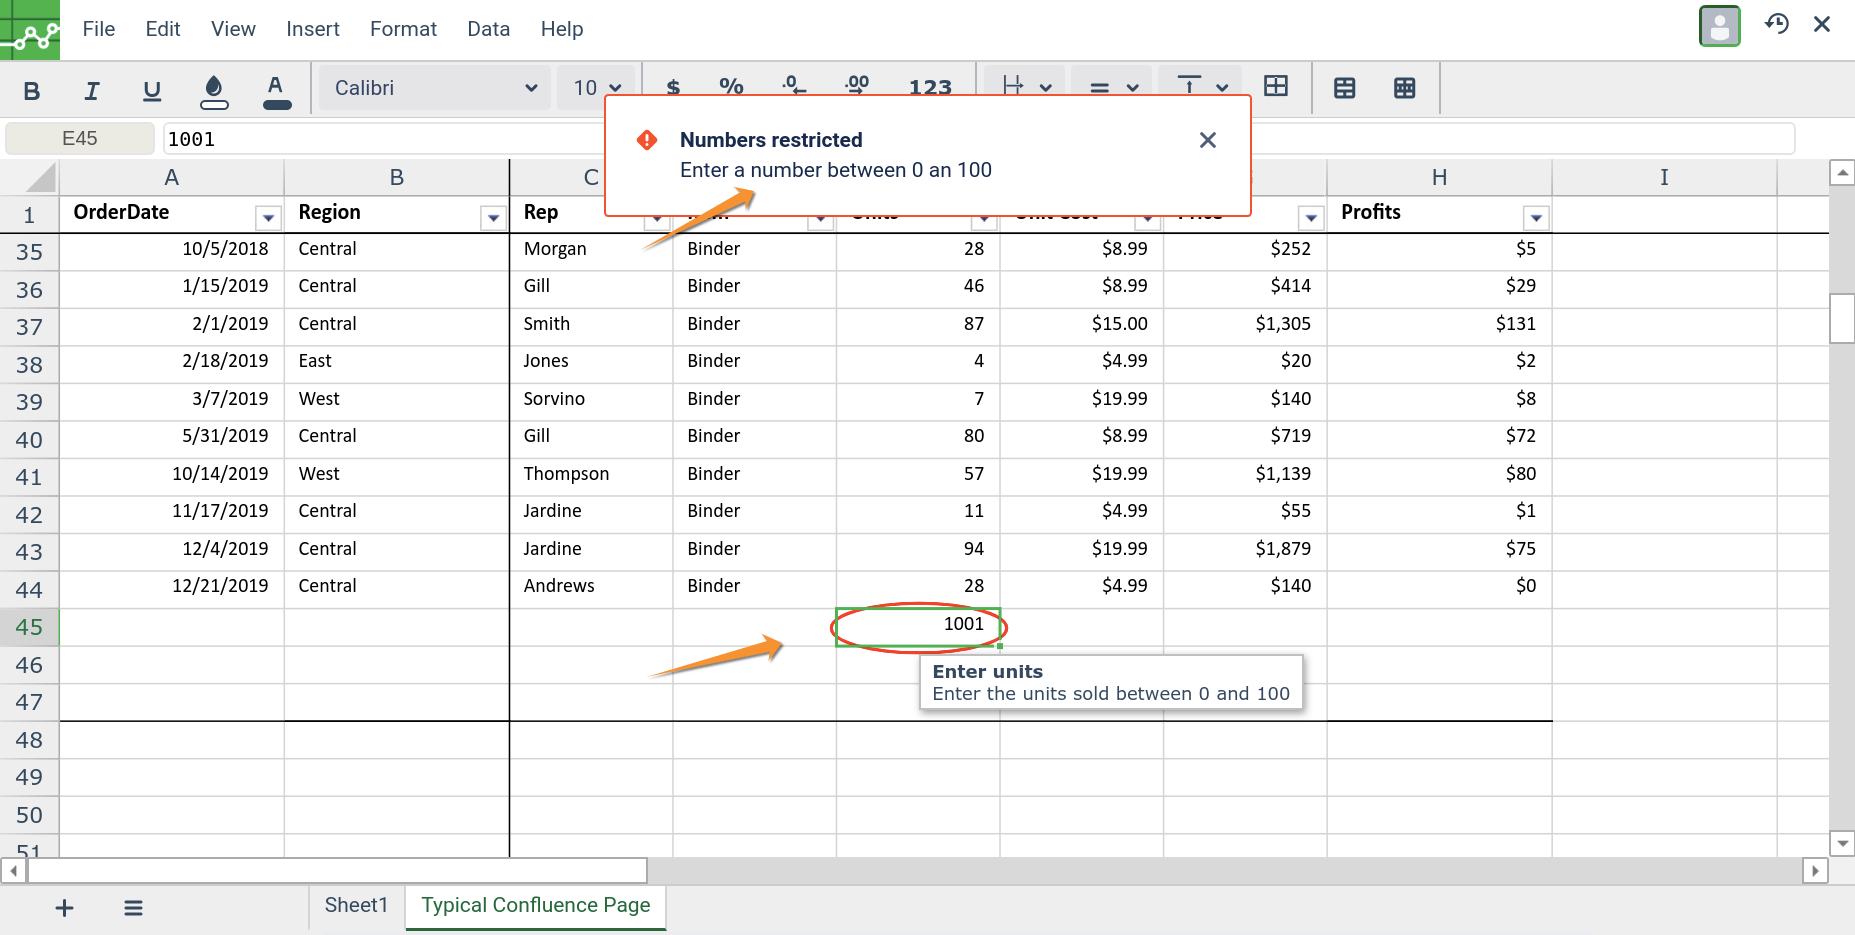
- (Optional) Enter Message at input of incorrect values.
In the lower section of the Dialog, you can choose to display a message when the user enters invalid data. To display an alert, select the "Show Alert" box
Different Alert types are "Error, Warning and Information". Select the required Alert type, title and the message you want to display.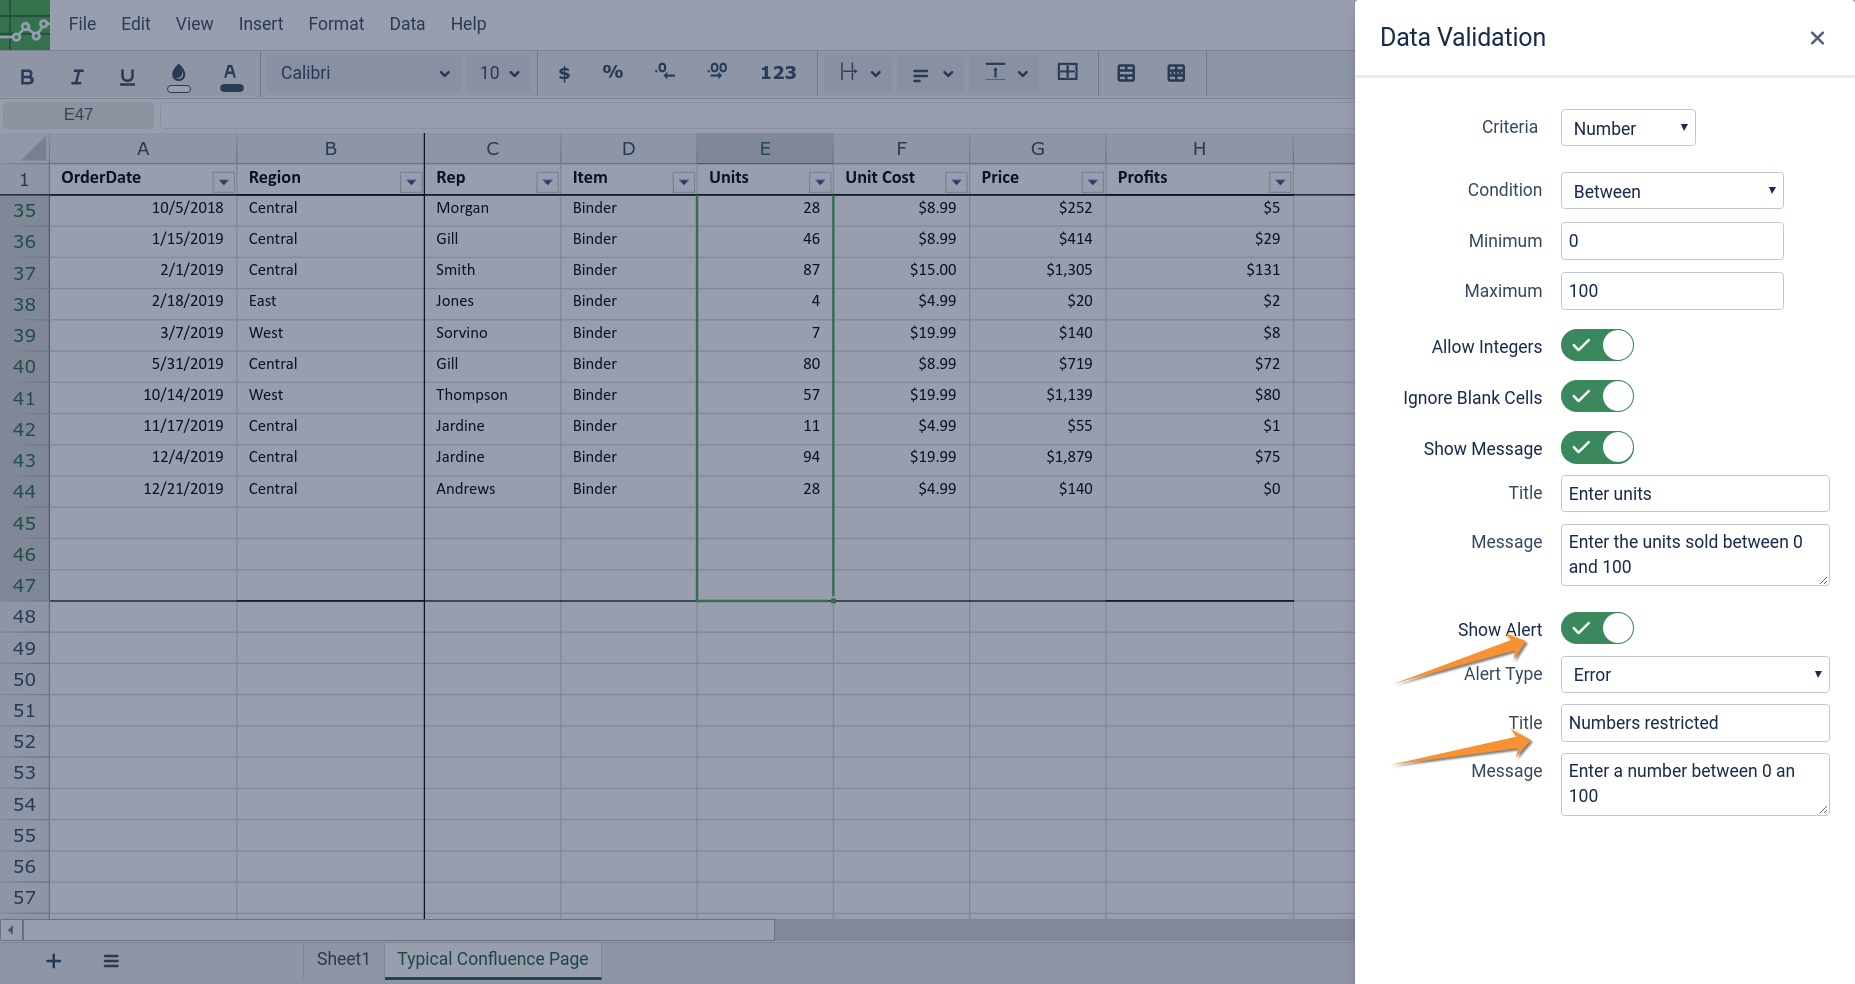
- Click OK once the values are selected.
- Note: Any incorrect values will be circled red and hovering over/selecting the cells will show the message.
- Note: Entering Incorrect value will show up the error message
See Also:
Data Validation: Restrict numbers in cells to a specific criteria
Data Validation: How to create a list (Dropdown)
Data Validation: How to create a list (Dropdown) based on values of other cells
Data Validation: Restrict cell(s) to a date with a specifics criteria
Data Validation: Restrict number of text characters that can be entered in cell
Data Validation: Custom Validation: Validate data based on formulas or values in other cells